Drawings To Construct Pergola : Learn How To Effortlessly Plan And Construct A Garden Gazebo Step by Step
Make the notches and remove the excess. Like the beams, the rafters are cut to length. We also ordered a simple cedar screen door, complete with the hinges and latch set. They are pretty stable from the notches but you still want to be safe and nail them in. Raise one end and slip the supports into the bases. The second row will be set up the same way, 10 feet in front of the first. Measure the length of line on the rafter, and make another (https://www.squaregazeboplans.com/gazebo-construction-plans) plumb line mark parallel to the first. Fasten the other ends of the cables to the cable-bolt holders.
Level and suspend this tube in the center of the hole by screwing it to temporary braces. Pergolas are the perfect size to add privacy and shade to your pool or jacuzzi spot. They would also provide support and attachment points for the intermediate eaves to come later. Popular non-wood roofing materials include outdoor fabric, plastic, glass, and asphalt shingles. You would take your time to build a gazebo that best suits your needs. Do not attach wall sets to each other or the gazebo. Next, loosely assemble the floor's structural members. Another splicing method-though it does not utilize uniform spacing-is to overlap the rafter ends that are supported by beams.
Asphalt shingles, much like a regular roof, are the cheapest option, but homeowners also go with slate, wood shakes or tile as well. This line will be the basis for your measurements from here on in. Always check with your homeowners association (read this post here) and your county's building department before erecting any structure in your yard. It has railings that match the frame and 8 solid columns with half-moon braces at the top for added stability. Master skills, get tool recommendations, and, most importantly, build something of your very own. Work with good judgement and don't forget to take a look over the rest of the related plans, as there are many designs and woodworking projects to select from.
These create extra support for plants that will grow across the top. Measure and cut the inside beam pieces. Transfer this mark all around the post. You can use metal strapping if you want. Attach the back of the wall to the house, either with mounting plates or directly into the side. Fan the template planks out using the nail in the middle as the axis pivot. Hold the flashing in place while you mark it for cutting. The installation we very fast and we got the look we wanted. What we have now is an 8 pointed polygon which is the deck foundation.
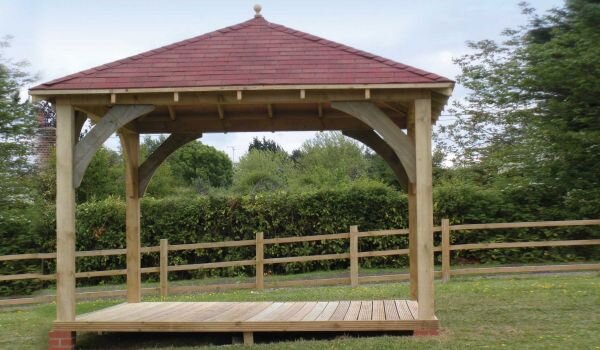
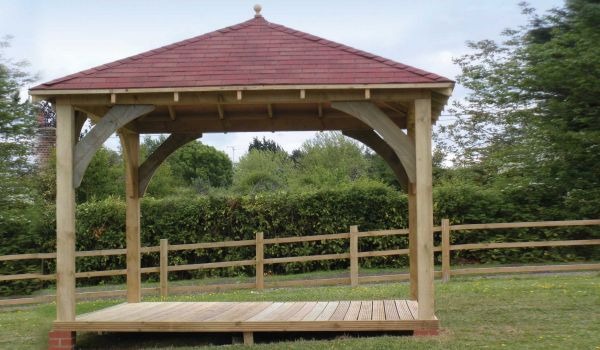
Note the reinforcing bar in the whole and the positioning of the support anchor. It's important to note that no roof covering is required for a traditional pergola, although some modern summerhouse designs may feature roofs with thatch, aluminium, tin, fibreglass or polycarbonate sheets. There's a lot of weight there, and having it come crashing down would be a bad, bad thing. Don't forget to drill pilot holes, if you want to prevent the wood from splitting. Anchoring the support into concrete Generally speaking, there are many ways in which you could anchor the columns into place. These tutorials are a lot to write about all at once when we finish a big project, so it takes a while to get to them all.
The choice of building materials will significantly depend on your budget, the size, the lifespan of the summerhouse and most importantly your preference. You'll go through a lot of screws but the result would be an extremely rigid deck with very high resistance to warping over time. Lift up the beam and rest it horizontally on the rebate joint. There isn't really a right or wrong answer here, you need to work with whatever suits you best, even if it requires a little bit more maintenance. Railing, sometimes called knee walls, is a good option. Read the local building codes before starting the project, so you comply with the local requirements.
Pergolas may be freestanding or attached to a house. So, as with the rest of this project, cut the pieces to fit. As you can easily notice in the diagram, you need to make 30 degree cuts at both ends of the beams. You could add additional pieces of narrowly spaced 2-by-2, 1-by-3, or lattice across the top of the struts for additional shade. Use corner brackets to lock them into place tightly. Remove the template, mark the 45-degree angle heart tips with an angle square.